Pages

Wednesday, May 7, 2014

Custom Dice Kickstarter

I am fairly cautious on the Kickstarter craze, having gone in for about 8 projects in two years, with good results on all but one.  This one with a few days remaining caught my attention and I decided to go in for it:

Custom Game Dice on Kickstarter

OK, if you dropped over and came back, you'll see that the creator plans to allow backers to submit image files and share those image files with other users.  Having made a few custom dice sets for SAGA using decals, the plan is to convert those into actual engraved dice.

I do have some concerns about the project.  Having done a small amount of graphics work, inexperienced users will have some problems in designing custom images. This could severely delay the project creator if he has to deal with numerous individual issues. Nonetheless,bringing on demand manufacturing to dice is a great idea and I hope it is successful.

So, if anyone's backing the Custom Game Lab Dice on Kickstarter, I am planning on creating the set of dice below for my planned Tang/Song Dynasty SAGA battleboard.  I've backed enough for multiple sets, so I might do a giveaway through the blog.


The three common symbols (1-3) are "soldier," the less common symbol is "sword" and the rare symbol (6) is "heavenly."

The nomads of the steppes spanned thousands of miles, from Eastern Europe to China, and frequently came into conflict with civilized (as in settled, not moral) society.  Similar problems create similar solutions, and the response of the Byzantines to nomadic incursions mirrored what China had already been doing.  Namely, play nomads against each other, co-opt their tactics (horse archery) and create mobile frontier armies.  My Chinese battleboard will basically be based on my old custom Byzantine board with a few changes to reflect Chinese medieval armies - such as the prevalence of crossbows.

Keep an eye out, and I will get the board out in early summer, as soon as I paint up some Essex and Assault Group figures sitting in my lead mountain.

Monday, May 5, 2014

1066 Part 4: William the Bastard, ahem, the Conqueror

William the Bastard Conqueror

As far as name recognition goes, few historical figures compete with William the Conqueror.  Maybe Alexander the Great, Christopher Columbus surpass him, but in the English speaking world "William the Conqueror" and "1066" are an enduring pair.

Born around 1028 to Duke Robert, second son of Duke Richard II (the Good) of Normandy. Richard's death in 1026 left succession to his eldest son Richard III, who died suspiciously a year later.  Robert's complicity has always been assumed and for that reason and other conflicts with the Church, he was encouraged to take a pilgrimage to Jerusalem in 1034. Knowing that death on such a long journey was highly possible, he named his illegitimate son William as his heir.  He also made his vassals swear an oath of allegiance to the child. After reaching Jerusalem, Robert took ill and died.

Oaths to dead men are hard to enforce, and throughout much of his minority William was frequently the target of powerful Norman lords who wished to control the duchy by controlling him.  Close relatives and advisers died frequently.  

Some solidity to his power was brought by his victory at Val-es-Dunes in 1047, with King Henry of France adding support to William's forces against rebellious Normans.  The relationship between the Norman dukes and French kings was always a contentious one, and in this context, William's desire for the English throne makes sense.  Like all vassals, he wanted a base of power independent of his lord. His claim on the English throne was through his grandfather, Richard II, whose sister was King Edward's mother, Emma. Pro-Norman and Pro-Saxon historians have spent centuries debating Edward's intentions, but he was considered a viable successor by Edward during the period of the exile of the Godwin family.  

Favored or not in 1066, William pursued his claim in a bold crossing of the English channel and met Harold's army on 14 October, 1066.  Victory was not certain, for Norman cavalry had yet to develop into the shock troops that would mark the knights of the later Medieval period.  With the death of Harold later in the day, the English forces collapsed and William pushed on towards London.

Below: In a moment of doubt and confusion at Hastings, William removed his helmet to show his men that he still lived.


Numerous Saxon nobles submitted to William and he was crowned as the King of England on Christmas Day, 1066.  Despite the coronation, resistance to William continued for several years.  His brutal response, particularly the "harrying of the north" laid such waste to the country that even some of his contemporary supporters were disturbed.

While his numerous detractors then and throughout history might disagree, "the Conqueror" is a better epithet than "the Bastard."  Throughout his entire reign, he energetically and enthusiastically expanded his reach.  From Normandy, he made vassals of lords in Brittany and Maine.  Form England, he campaigned against the Welsh and Scots, forcing King Malcolm of Scotland to be his man.

His success against rebellions diminished in his autumn years . His eldest son Robert and brother Odo led one such uprising, even defeating the Conqueror in 1078 at Gerberoi. Supposedly, William was unhorsed and wounded by Robert.

In 1087, a raid by the French on Normandy roused the now obese William to his last campaign. While pillaging the French town of Mantes, his horse reared and William ruptured himself on the pommel of his saddle, and died days later.  One final indignity awaited the King.  As his coffin was being moved, his body tumbled out and the smell from his bloated corpse sickened onlookers.

Modelling and playing William

William is frequently depicted by miniature sculptors and as an in-game character.  Gripping Beast offers two, mounted and unmounted, as does Crusader Miniatures.

Gripping Beast's four pack includes William, his half brother Odo and two support character. William is shown raising his helmet at Hastings.


I am very fond of Black Tree Designs Norman command pack, and it includes a couple of nice miscellaneous figures.


Above, William (center) flanked by a Crusader Miniatures Norman (left) and another BTD Norman (right).  Below, a falconer from the Black Tree Norman command pack.


In rule systems with characters, he is nearly always given top ratings.  Field of Glory rates William as an Inspired Commander. SAGA's depiction is one of the most powerful historical characters.  His abilities include a limited activation of two units per turn, instead of the usual one, and the ability to field non-mounted Hearthguard archers.  

Suggested Reading:

Marc Morris' The Norman Conquest is my preferred history on English politics in the eleventh century and William's invasion of England.  It is clearly written, objective and up to date on recent findings.


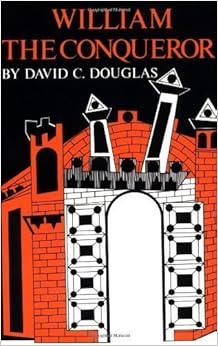
For a biography on William, I like David C. Douglas' William the Conqueror.  Published in 1964, a good era for historical writing. It is modern enough to be free from antiquarian language but too early to be afflicted with the social history fads and obsessions of modern scholarship.

I suppose anything can be given a humorous treatment, including the Norman invasion. The Doomsday Book (No Not That One) by Howard of Warwick is set in the days after Hastings, as a small group of men are sent by William to scout the English countryside.  At times, it is laugh-out-loud funny with its characters and Pythonesque wordplay.  Funniest character is easily Le Pedvin, an irritable one eyed Norman whose only response to continual frustration is a desire to kill something.  The Norman with an eye-patch in the photo above is my homage to this character.

Next in my 1066 series is the Conqueror's half brother, Odo, the man perhaps responsible for the tapestry which gives us our most contemporary visual record of the Norman conquest.

Tuesday, April 22, 2014

Gripping Beast Plastic Arabs - Review and First Look

Having good experiences with Gripping Beast's previous plastic releases, I preordered their Arab Spearmen and Archers boxed set.  A quick plug for my favorite online retailer - Architects of War - my order arrived on Friday, .


The box contains eight identical small sprues and there is no separate command sprue.  Each sprue contains five unarmored bodies and eight heads.  Three of the bodies have premodeled left arms for shield carrying warriors.  The other two bodies have attachable arms that can be used as archers or light spearmen.  The weapons on each spear are five right arms with spears, two right arms with bows, two quivers, three round shields, two teardrop shields, one right arm with a sword, one right arm with a horn and four attachable left arms in several positions.  Also included, is a green Renedra sprue with assorted base sizes for individually mounting a few figures and group basing the rest.


The quality of the figures is up to the standard set by previous Gripping Beast plastic releases.  Mold lines are minimal and the parts detach cleanly from the sprues.  The poses and stances are very natural; excellent for ranking up into large units.

I know some hobbyists do not like the preset left arm and prefer the adaptability of being able to attach more parts separately. For me, that's one less unnecessary gap to fill. Speaking of, all of the arms on my first batch attached very well. The gap line was so minimal that a little extra paint was sufficient to fill it in.

With any plastic release, a common complaint centers on the offerings - what's included and what's not.  I expect the lack of a command sprue with an armored officer and retinue will bother some as it has been a feature of previous previous plastic releases from this manufacturer and others.  In all honesty, I already have plenty of those figures in metal.  I appreciate forty low level troops for a reasonable price, saving the show pieces for metals.  And while the package and sprue size is very efficient, it means fewer add ons. For me, a few extra bits would have been a nice inclusion: small pennant banners, swords in scabbards and another shield variation.  
The five figures from a single sprue

As for uses, Gripping Beast obviously brought this set out in time for the SAGA Crescent and Cross release. Even without that tie-in, affordable Arab/Saracen troops is something the market has been demanding for some time.  The box touts the fact that the figures can be used from pre-Islamic conquest up to the Renaissance Ottoman battles.  I suspect with a little bit of conversion, some Colonial gamers could put these into a Mahdist uprising battle. But if a gamer wants to be most accurate, these are centered on the Crusade era.  The fully veiled heads will make good Berbers from the Almoravid invasion of Spain, while the beardless turbaned heads could be good for Ghazi era Persia - enemies of Seljuks. Speaking of Seljuks, I don't think these would fit Seljuk infantry for the Crusade period.  Eleventh century Seljuks might have been more likely to be bare headed or helmeted, and most would favor trousers over robes.

Outside of historical armies, lots of eastern themed fantasy options exist.  A Middle Earth gamer could use these for Easterlings. I have been itching to return to my Dark Sun AD&D game, and with some appropriate weapon changes, a few of these might do as NPCs.


The two archers.  The fully veiled figure will represent a Berber in Spain. 

For a size comparison with metals, the two on the left are Gripping Beast, on the right is an Artizan Moor and a Black Tree Design Arab.  The plastic figures are of the same size and proportion as my metals. 


For the archers: The Gripping Beast in the center is a bit a less bulky than the Artizan Moor on the left, but they should mix in well together.   The Essex Arab archer on the right is noticeably diminutive beside them.  It is an older figure, and obviously a victim of the "scale creep" in 25/28mm.


Saturday, April 12, 2014

Ronin

It must be spring break.  How else could I get in two wargames in a week? This time, it was Ronin, a skirmish wargame that is fast becoming my favorite ruleset.

Ronin's rules for a warrior buntai (warband) gives two options - either hierarchical with more lower ranked warriors than samurai, or strictly higher class, with all rank 3 warriors or better.

In this game, we played the two options against each other. My buntai, holding a small country retreat, is composed of  a hatamoto (rank 4), a samurai (rank 3) and 4 bushi (rank 1 or 2).


The enemy, two mounted and two foot samurai approach from the opposite corner.


The samurai and 3 attendants stride out to meet the enemy.


The two mounted samurai execute a special attack, the ride-by.  They suffer a disadvantage on their attack rolls, but if successful, finish the attack out of contact with the enemy. One of the attendants falls, while the other survives the ride-by: 


My initial plan was for my hatamoto and his attendant to defend the gates, but my sub-commander (five year old son) who was only supposed to function as observer. rashly moved the two models outside the wall.  


I made the most of the decision, and hopefully could catch the enemy from the flank. Fortune favors the bold!  His horsemen fall due to some lucky yumi strikes from my samurai and my hardy attendants. The day is mine!


My opponents final model left is the samurai in blue.  


After taking out the attendant, I have two models left, an attendant and a samurai armed with a yumi (bow).  Feeling confident and a bit honorable, I decide not to use the bow and move into melee. He was after all, already wounded.   


Unfortunately, we tied on initiative.  In this game, this means that both attacks are simultaneous, and enhancing defense rolls is not possible.  And so...


Both strike killing blows.  Not a bad run for the last samurai.  


The lone survivor

I like Ronin because it is a versatile but quick system. Weapons have statistical variations - katanas have no modifier for example, but the the two handed sword give you a +1 attack modifier along with a -1 initiative modifier.  Which is significant, because initiative is key in this game since response attacks are not automatic .  Other combat details such as mounted combat, reloading, and disarming are handled efficiently without becoming too granular.  

My models were Assault Group and West Wind and my opponents were from 1st Corp. These are some of the better ranges for early samurai.  I'll post some closeup comparison shots and reviews shortly.


Thursday, April 3, 2014

Byzantines on the Steppe

The day started with a number of unfortunate events - I lost my new glasses, almost set the kitchen on fire with a mislaid oven mitt - so I probably should have listened to omens and stayed off the field of battle.  But I was playing the Byzantines and good Christians should pay no mind to such superstitious nonsense.  But still...


We had to escort a pair of diplomats across the steppe to a friendly port on the Black Sea.  With us, was a unit each of Khataphracts, spearmen and levy.  We also had two units of archers and a sword for hire unit of steppe mercenaries from my own meager pay to guide us.


The escort pieces are in this case, two diplomats surrounded by bodyguard.  


The Khataphtacts take the left flank and archers and steppe nomads take the left.  Ahead of us, slave foot archers are in the center with warrior nomads at the wing.  The 3 points of warriors are broken into 4 units of 6 


With the heavy cavalry charging forward, a group of toxatoi move between a ridge and the raised road for cover. 


The khataphracts charge the steppe warriors, knowing that they will collapse immediately under 


The targeted unit immediately flees before contact is made thank to The Steppes ability on the battle board. As smart player of this faction will always keep a die on this ability


Next turn, my plan is to load up two activations for the hearthguard, so when one flees, I will hit the other.  However, thanks to the Wild Cats ability, another warrior unit from across the table pops in and I am now surrounded.


The heavily armored cavalry (6 v. shooting) had withstood missile attacks, but a string of lucky rolls from 3 units wiped them out.  


The Warlord and surviving units circle up and spend some defense dice.  At this point two hours in, I had to call it a game because of some commitments later in the day.  Unfortunately, I have no pics of my other archers still on the hill with no casualties, and picking off any models within range.  Possibly, the escorted units could have made it to the end of the road especially with a double activation.  Overall takeaway: if fighting the Steppe Tribes with Byzantines or Normans, have at least two units of hearthguard cavalry positioned to catch fleeing warriors in a pincher.  That, or shut down their activations with the Pagan Rus abilities.  

Thursday, March 27, 2014

1066 Part 3: Harald Hardrada, the Last Viking

There are quite a few contenders for the title of "The Last Viking,". Certainly one of the most renowned of the later Vikings was Harald, son Sigur, known to history as Harald  Hardarda, meaning Hard Ruler.

Early Years

Harald was born in 1015, and the time of the Vikings was already passing. Worshipers of the old gods were dwindling in number, with fewer men taking to the long ships to raid, preferring instead to settle, farm and trade. Moreover, a century and a half of Viking raids had brought wealth to the northern lands. This wealth became increasingly consolidated into fewer and fewer hands. These Scandinavian rulers like Harold Bluetooth extended their authority across vast areas, and promoted centralization of power through the monotheistic and hierarchical religion of Christianity.

Harald's half brother of Olaf II (St. Olaf) of Norway was another such centralizer.  He was ousted from rule by Cnut, who was constructing a northern empire from Denmark to England.  Olaf's return to rule was contested by nobles not anxious to see the return of the heavy handed Christian.  He died in the Battle of Stiklestad in 1030. The young Harald, all of 15, survived and left Norway to seek his fortune in the east.

For a while he lived among the Rus but the road to glory and fortune led to Constantinople and the famed Varangian Guard.  Harald's tenure in the Empire's service as entered the realm of quasi-myth. He fought in Sicily and Syria and broke open an Arab castle by unleashing upon it a flock of flaming birds. He also gained entry into another enemy fortress through a variation on the old Trojan horse trick. While these stories are mostly fanciful, they do tell us that Harald was more than just a strong man with an axe. Where possible, he used trickery and his wiles to win battles and preserve his men's lives.

After running foul of the jealousy of the man-hungry Empress Zoe (another tall tale no doubt), he returned to Norway around 1045. The kingdom was ruled by his nephew Magnus, illegitimate son of Olaf.  His demand to share power as co-ruler was granted but Magnus conveniently took ill and passed away a short while later leaving Harald the sole ruler.  As king, his main policy seemed to be to conquer other kingdoms, and pay for it with high taxes on his own people.

Six Feet of English Earth 

When Northumbria revolted in 1065, Harold Godwinson of Wessex appeased the rebels and removed his brother Tostig as earl. Tostig sought allies in Flanders among his wife's people, but he eventually ended up in an alliance with King Harald.  After Edward's death, King Harald saw England as a prize ripe to be picked. His preparations were extensive; he landed in England with well over 200 longships.

Harald and Tostig met the earls Morcar of Northumbria and Edwin of Mercia at Fulford, routed their forces and occupied the town of York. Harold quickly mobilized and met Harald and Tostig with their warriors surprised and unprepared. In a most likely invented story of the pre-battle exchange, Harold offers to restore Tostig's lands if he abandons the invasion. When asked what he will give Harald, Harold says "Six feet of English earth, maybe more since he is bigger than the average man."

Which is exactly what Harald got that day, 25 September 1066.  After many hours of melee, he fell in battle, along with most of his Norsemen. A fleet of about 20 ships was sufficient to carry the survivors back to Norway.  Harold's victory was significant, with his superior tactics defeating the fury of the Vikings.  However, a quicker and more decisive victory by Harold would have left him with more men

Modelling Harald

Two excellent miniatures are marketed for Harald, both depicting him at different points in his life. Crusader Miniatures produces a command pack for Varangians in their Byzantine line, with the leader easily able to represent Harald on the table.


For the older King Harald, Gripping Beast's Harald is visually impressive but almost a scale breaker. While the Norse were taller than the average, and Harald was taller than the average Norseman, this mini stands 36 mm from foot to top of his head.


I decided to accent his height even more by placing him on a built up 40mm base.  Here's a shot of him with some 28mm mixed Vikings:


Historical Fiction & other media

As the last Viking invader, there's no shortage of historical fiction about Harald or in which he appears. I have not read any of the half dozen or so books I have identified that center on Harald.  Here are two recommendations for books in which Harald is a suporting character.
 
Harald is a significant part of the the last book of Tim Severin's Viking trilogy. Without meaning to do disservice to the series, it is in some ways an eleventh century Forrest Gump. The main character is an illegitimate son of Leif Erikson, who manages to encounter every important historical figure from Vinland to Constantinople. Implausible, but great fun.

Harald appears as a slightly dim and oafish Varangian in Thomas Holt's Meadowland, a colorful novel in which two older Varangians recount their experiences travelling to Vinland.

Also, Giles Kristian, author of several books of historical fiction produced a short tribute to Harald for youtube.  Not a bad six minutes of your time: Harald's Saga


Monday, March 24, 2014

Harold Godwinson: The Fighting Man

In reading about Harold Godwinson, one of the more fascinating and frustrating details about Harold the warrior was his banner.  Fascinating, because of its reported design and beauty; frustrating, because no depiction or illustration of it exists.

According to the scant descriptions, it was an image of warrior embroidered on a cloth (red?...blue?) with gold and jewel ornamentation.  The Bayeux Tapestry does not depict it, showing only Harold's red dragon of Wessex.  The fate of the fighting man banner after Hastings is unknown.  Most likely, it fell with Harold on the hill and was taken by the Normans.  Some say that it was sent as a gift to the Pope Alexander II as thanks for lending William a papal banner for the invasion.  It could just as well have been squirreled away by survivors and lost to the ages.


The coloring was lifted from some reenactors because I thought the white on red was very striking for a scale reproduction. I made the banner by rolling out a piece of green stuff like a tiny pizza crust.  After it hardened, I trimmed it square, and sanded it with very fine (400 to 800) sandpaper.  I hand painted the fighting man with acrylics.


I finished the one on the right first, but was a bit unhappy with the lack of dynamics in the pose.  I then did the one on the left with the raised axe.  I still probably prefer the first figure, but I learned on the second one how to drape the green stuff before it hardened to simulate a billowing banner.  


A book on Anglo-Saxon art provided me with some figure inspiration, such as this piece of stonework from Shaftsbury.  

Next time, a look at the third contender for the English throne, Harald Hardrada.